
People say that WordPress isn’t as secure as other CMS but my 10 years experience says that it has the best security if you configure WordPress properly. Within 10 years working on WordPress not a single hack. And honestly it isn’t some rocket science. You can also be stress-free like me by doing some small tweaks to the default WordPress.
- What Are The WordPress Security Issues & How They Make WordPress Vulnerable?
- 1) xmlrpc.php Enabled By Default
- 2) JSON Rest API Enabled By Default
- 3) Default Login Screen
- 4) Outdated Plugins/Themes
- 5) Unofficial Plugin & Theme Installation
- 6) Default WP Prefix
- 7) Using HTTPS
- 8) Default Username
- 9) Open Access To Default WP Files
- 10) Install A Security Plugin As Soon As You Install WordPress
- WordPress Security Best Practices
What Are The WordPress Security Issues & How They Make WordPress Vulnerable?
What most people do is that they install the default WordPress and start working on it. The default WordPress comes with these issues:
1) xmlrpc.php Enabled By Default
xmlrpc.php is a super old feature of WordPress which allows you remotely access WordPress via other apps such as the Windows Live Writer (app to write, edit, publish content, comments and view stats without logging in to WordPress).
To be honest, I don’t see the use of this now. Gutenberg is here and most publishers use either Gutenberg, classic editor or MS Word/Google Docs to write content. For stats, most use Google Analytics v4 or Cloudflare or some other app which makes use of JS script or API.
How Attacks Are Performed Via XML-RPC (Remote Procedure Call) Protocol?
This protocol uses the HTTP POST method and has many methods supported by WordPress. It can be used for brute-force attacks, DDoS attacks and port scanning the server. It also exposes the IP address of the server.
The Solution
The only solution is to disable xmlrpc.php and block the access to xmlrpc.php (even better).
How To Disable XMLRPC?
1) Via Security Plugin
Almost every security plugin can disable xmlrpc.
WordFence has disable xmlrpc feature but it is not turned on by default. You can turn it on by:
- Go to Login Security Tab of Wordfence > Settings Tab > 2FA
- Check the box ‘Disable XML-RPC authentication‘
2) Edit in .htaccess
Don’t want to use another plugin. You can use these lines to block all IPs requesting the XMLRPC calls:
# Block WordPress xmlrpc.php requests for All IPs
<Files xmlrpc.php>
order deny,allow
deny from all
</Files>
Works only on Apache & Litespeed
Since Nginx doesn’t uses htaccess file edits, this code doesn’t work on Nginx servers. I tried this on OLS as well but it wasn’t working there because of the selected rewrites allowed. This works on Apache and Litespeed.
3) Make A Custom Site Specific Plugin
This method can be used for all four servers.
- Open your notepad and write this:
<?php
/*
Plugin Name: Plugin Name
Description: Disable XML-RPC on your WordPress site
*/

add_filter('xmlrpc_enabled', '__return_false');
?>
- Put your desired name in the plugin name and rename the file as the name of your plugin with .php extension.
- Upload the plugin by going into plugins > add new > upload plugin > select or drag your yourplugin.php file
- Activate the plugin
You can also edit the theme’s functions.php and use this code in it:
//Disable xmlrpc
add_filter('xmlrpc_enabled', '__return_false');
Disabling REST API Breaks Gutenberg And Other Apps
WordPress default page editor ‘Gutenberg’ uses JSON Rest API. Disabling it with make it pop up a warning and breaking some of its functionality.
It’s better to secure the Rest API endpoints. You can apply authentication to such requests
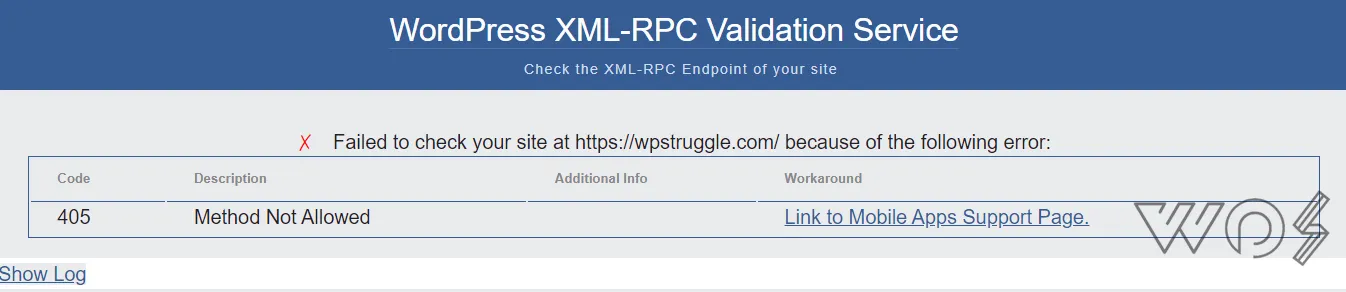
How To Check If XMLRPC is disabled?
You can try pasting your https://yourwebsite.com/xmlrpc.php on this XMLRPC validator and see what response it generates. If you have disabled XMLRPC then it will give you this error.
2) JSON Rest API Enabled By Default
WordPress Rest API is enabled by default since version 4.4. This features allows you to connect via external apps without the need to logging in the WordPress dashboard. Unlike XML RPC, REST API is resource-oriented and lighter.
Having the default REST API comes with many vulnerabilities allowing the hacker to do SQL injections, DDOS attacks, and so on.
If you don’t have any external apps integrated with your WordPress website, you can disable it.
However, if you are using it, you can improve its security by:
- Using Strong Authentication Methods Like OAuth 2.0, Token Based
- Setting User Role and Permissions (can be done via WordFence)
- Rate Limiting and IP Whitelisting (can be done via WordFence)
How To Disable Rest API In WordPress
1) Via Functions.php
Put this code in your functions.php file from the theme editor or WP Snippet code plugin:
add_filter( ‘rest_authentication_errors’, ‘disable_rest_api’ ); function disable_rest_api( $access ) { return new WP_Error( ‘rest_disabled’, __(‘The WordPress REST API has been disabled.’), array( ‘status’ => rest_authorization_required_code())); }2) Via Plugin
There are many plugins that disable REST API. WordFence doesn’t disable it but instead slightly secures it by disabling user enumeration.
How To Secure Rest API In WordPress
3) Default Login Screen
By default, WordPress has ‘wp-login’ as the default url for logging in the admin dashboard. It allows the hackers to openly test username and password combinations.
After installing WordPress it is recommended to change the login url to a customize one. The manual way of changing the url is quite tedious so it’s better to use a plugin.
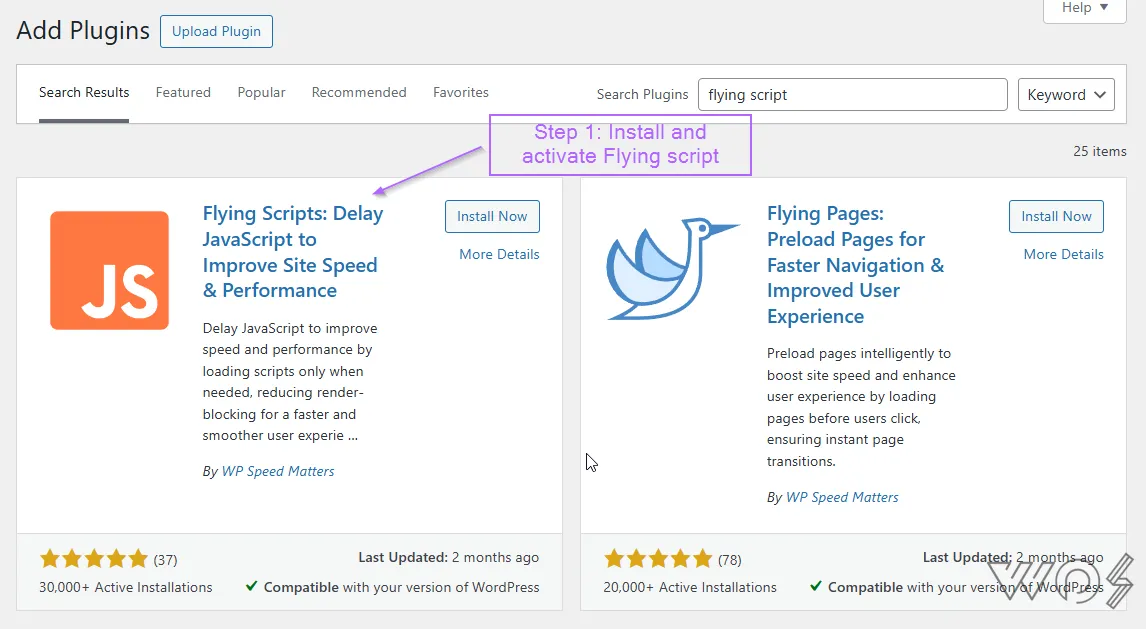
WPS Hide Login plugin is one of the first security plugins to change the login URL and works effortless.
How To Change WordPress Default Login Screen Via WPS Hide Login Plugin
- Install and Activate
- Go To Settings > General. At the end you will see the WPS Hide Login section
- Add your desired url to login and url to redirect if someone uses the default login url
If you see ‘?’ or an unknown character with the url, change the permalink settings to post name or anything other than the plain.
4) Outdated Plugins/Themes
Outdated plugins and themes are one of the reasons why WordPress can get unsecured. WordPress websites uses many plugins and themes made by different developers. Over time they can get vulnerable and once a vulnerability is found, an update fixes it.
It is recommended to update plugins and themes to their latest versions to prevent any security vulnerabilities. WordPress now comes with auto update feature by default as well. You can turn it on for each plugin.
Also try avoiding the use of old plugins that haven’t been updated added for a long time.
5) Unofficial Plugin & Theme Installation
Plugins and themes that are not a part of WordPress community or the ones that have been pirated are notorious for containing malicious code and backdoor entry to your website. It is recommended to install plugins and themes via the official WordPress website or developers with good reputation.
6) Default WP Prefix
With every default install of WordPress, we have all the files and fields in WordPress starting with the prefix (wp_). This makes it easier for the attacker to launch an attack on the files of which the address is already known.
It is better to change the WP prefix either while installing WordPress or when you have installed it. This can be done via

How To Change WP Prefix
On Initial Installation
When you install and setup WordPress, you are asked to name the table prefix. So you can set your custom one from there. Make sure it is a complex one and doesn’t start with wp_.
Please make a backup before making changes
Any method for changing wp_ prefix requires editing in the files and database of WordPress and often it can lead to redirect file issues. So always make a backup before doing this. You can use Updraft or any other backup plugin to make complete back of your website including the database.
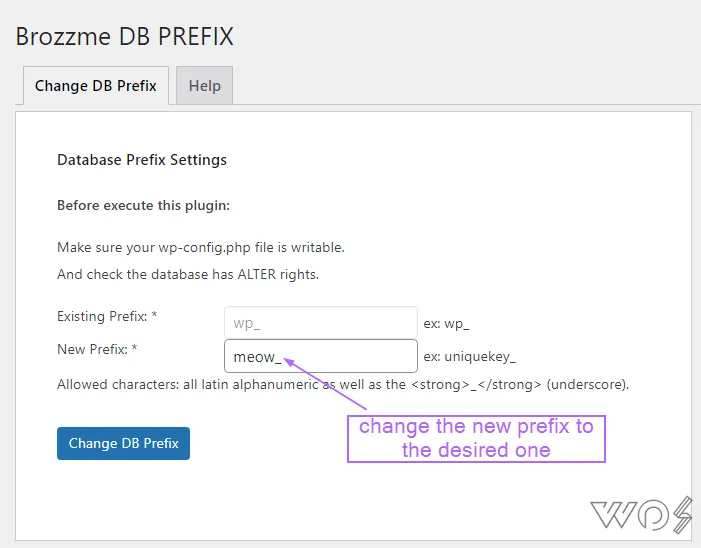
Via Plugin
The easiest method out there. I have only found one plugin that works and change WP prefix is Brozzme DB Prefix & Tools Addon.
7) Using HTTPS
There’s no valid reason of using HTTP header now since browsers like Chrome give warning as website not secured. Moreover, an SSL certificate is readily available for free now with every hosting platform. HTTPS is secured and has a good SEO boost as well.
You can use ‘Let’s Encrypt’ Plugin to generate and install SSL certificate and move to HTTPS. A better approach is to manually add the certificate credentials in your website’s hosting panel.
8) Default Username
If you have installed Wordfence and see the login logs regularly, you might have seen attempts to login with a correct username. Now how come the attacker already knows your username. Well, WordPress is to blame for this.
Whenever, a new user is made in WordPress, it uses its username in the URL about author or user bio page. This is visible to everyone.

How To Change The Username From URL To A Custom One
While there are many plugins and php scripts to do this but the thing is that it’s just a database problem and I know you think horrible things would happen but trust yourself.
Step 1: Just open your website’s database in myphpadmin and go to wp_users > (user you want to change).
Step 2: Edit the user_nicename to a customized ones. And that’s it. Simple.
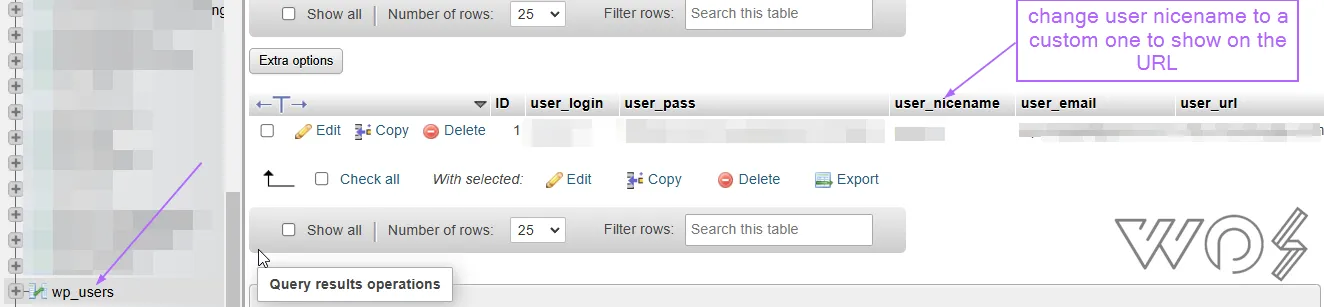
Your username from the URL will be gone and replaced by this name.
9) Open Access To Default WP Files
Every hacker knows the default directories of the default WordPress install. And by default anyone from any IP can access them with the given credentials. This is more of an extra security step which is idle for those who have a static IP address.
For Litespeed and Apache
You can deny file access from all other IPs but allow it only for your IP address. The simplest way to do this on Apache and Litespeed is putting this code in htaccess file:
order allow,deny
deny from all
allow from IP
Replace ‘IP’ with your IP address and all done. Now no IP will be able to access your files except you.
For Nginx
For Nginx, you need to create the conf file first in your Nginx files directory:
cd ~/nginx/example.com- Create a file named access.conf.
- Add code from one of the examples below.
- Reload Nginx for the changes to take effect.
location / {
  allow 1.2.3.4;
  deny all;
}
10) Install A Security Plugin As Soon As You Install WordPress
Security plugins such a Wordfence, Sucuri, All-in-one security are lifesavers for every WordPress user. I prefer Wordfence and I have made a tutorial on it as well but at the end it is your personal preference.
WordPress Security Best Practices
- Disable xmlrpc.php
- Disable or Put Authentication of JSON Rest API
- Change Default Login Screen
- Auto update plugins or keep the plugins updated manually
- Never install pirated and unofficial plugins and themes
- Change default WP prefix
- Use HTTPS
- Change Default Username
- Add 2FA to your logins
- Block other IPs from accessing your files
- Use Cloudflare or any other DDOS protection service
- Use security plugins and do regular scans
I hope that I haven’t missed any other essential step to harden WordPress. If so do let me know in the comments.